Easy WordPress Analytics
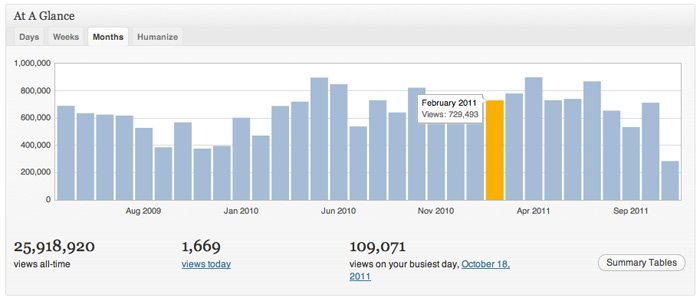
Ever wanted to know what kind of traffic your website is getting, but didn’t want to set up full blown Google analytics? There is an easier solution, and it is bundled in with the Jetpack plugin for WordPress analytics.
To get the plugin, go to the plugin search screen and type in “Jetpack.” Download and activate the plugin. Once installed, you will need to authorize the plugin to your WordPress account. If you don’t have a WordPress account, you can sign up here.
Once you have authorized Jetpack and it is running, click on the Jetpack icon in the left hand menu under the Dashboard link. The module we will be using for our analytics is called “WordPress.com stats” and is the third item in the top row. Click the configure button and change any settings in this menu accordingly (most likely you won’t need to do anything here.) Click “Save configuration.”
Return to the Dashboard display by clicking the menu icon right above Jetpack. Scroll down to the bottom of the screen. Under the heading “Site Stats” is where all of the analytics of the website will begin to populate.
Currently there is no data to display, and the message “We were unable to get your stats just now. Please reload this page to try again.” reminds us to wait 24 hours to view our site traffic.
The information available on this analytic system is very basic and only intended to give a general overview of your site’s traffic. For deeper, more insightful analytic data, try Google Analytics.
Have you been using analytics successfully on your website? Let us know how you go about it in the comments below–>


Leave a Reply
Want to join the discussion?Feel free to contribute!