WordPress form not working is one of the most common issues I come across as a web developer.
By default, WordPress uses the internal mailing system of the website or PHP mailer to send mail.
Mail services such as Gmail and Outlook and others don’t particularly like PHP Mailer because that’s where all of the spam on the web comes from.
So when you’re setting up a brand new WordPress website and using a default plugin for the contact form, it is very likely that the mail will never make it to your email inbox.
Even if it does make it to your inbox, the likelihood that it consistently comes through and remain that way it’s very unlikely.
So how do we fix the WordPress form not working issue?
Well, it’s actually rather easy! The very first thing we wanna do is go download the plugin called WP Mail SMTP, which stands for Simple Mail Transfer Protocol.
This will allow us to get off of the default PHP mailer and choose a service to deliver our web mail such as Google or a whole bunch of others that are available.
Once WP Mail SMTP is downloaded, we want to get to the settings area and click on the Launch Setup Wizard button. Next, click on the large orange button that says Let’s Get Started.
Then we want to select the SMTP mailer that we want to use to send our webmail. I choose Google/Gmail for my websites and it seems to work just fine.
Click the save and continue button, it will pop up with a warning message just click I understand and continue on.
This next page, Configure Mail Settings is where we will need the client ID and client secret to your particular email account. This is the most challenging part of setting this up.
There is a fantastic tutorial on the WP Mail SMTP plugins website for this.
What we want to do is to create a Web app in your Google account so you can go to the Google Cloud Console.
If it is your first time using this it will ask you to agree to terms of service, go-ahead do that.
Next, we want to click on the My Projects tab on the top of the dashboard and then click on New Project.
For your new project, enter a project name and select an organization and location from the dropdowns, then click the Create button.
Now that is created, we need to initiate the Gmail API. Look at the menu on the left hand side of the screen and select APIs & Services » Library.
Then look under Category and click on Email, or enter “Gmail API” in the search bar. Click on the Gmail API result.
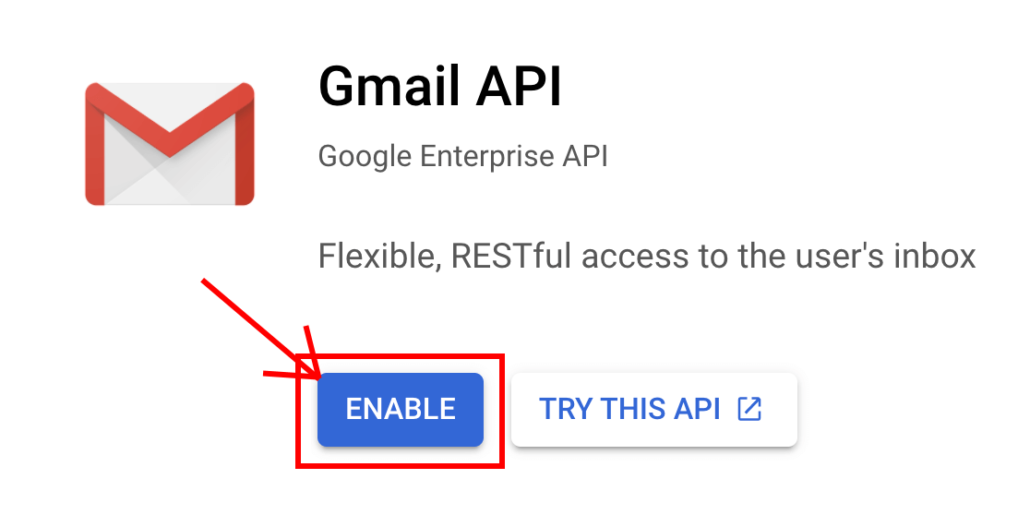
Finally, on the Gmail API page, click on the blue Enable button.
After the Gmail API is initiated, it should redirect to the Gmail API Overview page. On this page, we want to click on the CREATE CREDENTIALS button.
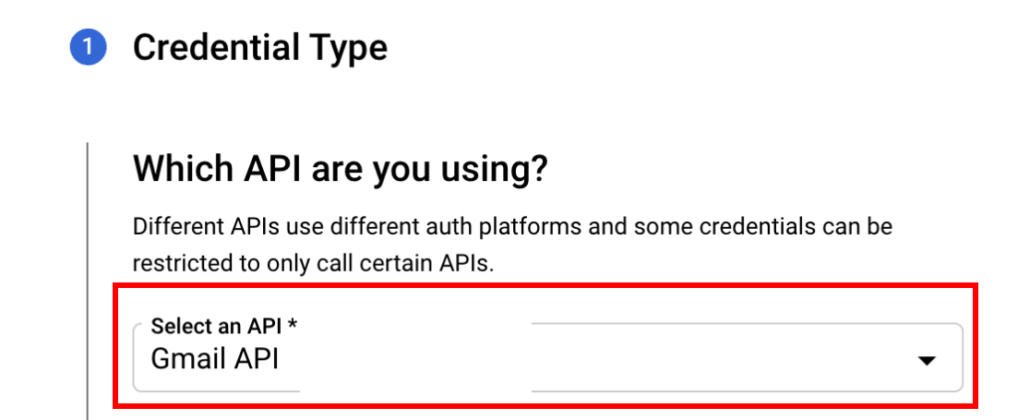
Gmail will ask what type of API do you need in a drop down list, select Gmail API there.

Next, under What data will you be accessing?, select the User data option. Then click the NEXT button to proceed.
The last step is setting up Your OAuth Client ID. From the application type dropdown menu, select Web Application.
You can leave the name blank or fill it out with your company name.
Click on the + ADD URI button and input the following: https://connect.wpmailsmtp.com/google/
Then click on the CREATE button to complete this step.
Now we just need to get the app published so it can be used for our mail routing purposes. In your Google Cloud Console sidebar, go to APIs & Services » OAuth consent screen. Under User Type, click on the Make External button.
Next, click on Credentials in the left side menu.
Once you’re on the Credentials page, in the OAuth 2.0 Client IDs section you can see the details of the web application you just created. To view the Client ID and Client Secret, click the pencil icon.
This will open all of the details for your app. On the right side of this page, you’ll see the Client ID and Client secret values.
The Client ID and Secret Value need to be copied and pasted into the settings of the WP Mail SMTP plugin. Once that is completed, we can finish the installation and that is it!
Your website mail will now be routed through Gmail’s servers instead of using the websites PHP mailer to send out. That’s how one fixes the infamous WordPress form not working error.
Have a question about this process or want me to set this up on your website? Drop me a line on our contact page and I will get in touch very soon!
Read next: The Best WordPress Form Plugin


Leave a Reply
Want to join the discussion?Feel free to contribute!