 WooCommerce is one of the most popular shopping cart solutions for WordPress. Pretty much every single eCommerce site that is WordPress is running WooCommerce from what I’ve seen. And it works great!
Now it’s rather easy to set up and many newbies to WordPress have no problem getting it going and getting their products set up and online ready for sale. One of the biggest problems though is figuring out how to charge the customer for shipping. Now many store owners want to calculate the shipping based on where their customer is at, and I can understand the desire to do that. However, this is a rather complicated formula and has a lot of things that can go wrong with it, so I don’t recommend going this route with WooCommerce.
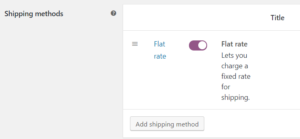
Instead of using the shipping calculator, which is often wrong, I recommend going with flat rate shipping. So how do you set up flat rate shipping in WooCommerce? It’s not necessarily very hard but it’s also not very easy to find where these controls are located. You would think they would be under the Products settings area, but that is not actually where they are located.
The settings for shipping is located under the main WooCommerce settings. So scroll down the main menu in WordPress until you find WooCommerce, and hover over that and select Settings from that menu.

Now, inside this menu you’re going to select from the horizontal menu the Shipping tab. Inside the Shipping tab there is going to be a list of Zone names, with the very first one listed by default United States. Click on this, and select the edit button next to shipping methods. At the very top there is Shipping Methods, click on this and then you’re going to want to select Flat Rate from the drop-down list. 
In the Shipping Class we are going to set up several different types of shipping classes. You may want to select a light shipping, a medium shipping and a heavy shipping class depending on what type of needs you have for your packages.
Inside this menu we are going to set the pricing for each one of these shipping classes. So if the cost is $10 you’ll put a 10 inside this box for the lightweight, for example. Now it’s important to know that this is only going to set the shipping cost for one item, so when multiple items are added to the shopping cart it’s only going to charge shipping at that one price.
To make it so that the shipping multiplies times how many items are put in the card, you’ll need to use the following short code: [qty] * 10 where the 10 represents the amount that you want to charge for shipping.
Now repeat this process for all the other shipping classes that you have. So now that this part is done, we need to go back to the Products and set the shipping amount for each product. To do this click on Products in the main menu, and then click on one of the products that you have and scroll down to Product Data.
Inside this menu there is an item for shipping, it is the third item down in the menu list after General and Inventory. Inside this menu we are going to select from the shipping class drop down menu one of the shipping classes that we set up earlier, whether it be our light, medium or heavy shipping classes. Then update and save the product.
That’s it! You’re all done setting up flat shipping in WooCommerce, you have set up flat rate shipping for your products and feel free to set multiple different types of classes for each of the different products in your store and you don’t have to worry about the calculator messing up and not charging the customer enough to cover the shipping cost.
Have a question about how to get WooCommerce running correctly on your eCommerce website? Give me a call at 406-208-8733 or fill out our website form located here. I look forward to helping you!
Want more eCommerce goodness? Check out my article on 50 Tips to Build a Successful eCommerce Business


Leave a Reply
Want to join the discussion?Feel free to contribute!